A well-installed concrete driveway not only enhances the curb appeal of your home but also provides a durable and low-maintenance solution for your vehicle’s parking needs. Installing a concrete driveway may seem like a daunting task, but with the right guidance and professional help, it can be a smooth and rewarding process. Here’s a comprehensive guide to help you understand each step of the installation process.
Planning and Preparation
Assessing the Site
Before any work begins, it’s crucial to assess the site where the driveway will be installed. Consider factors like soil type, drainage, and the slope of the land. These elements can impact the longevity and performance of your driveway.
Designing Your Driveway
Decide on the layout and dimensions of your driveway. Consider the number of vehicles you need to accommodate and any additional features such as walkways or decorative elements. A professional contractor can help you design a driveway that suits your needs and complements your home’s aesthetic.
Excavation and Base Preparation
Clearing the Area
The first physical step in the installation process is clearing the area of any vegetation, rocks, or debris. This ensures a clean slate for your driveway and prevents future issues like cracking or sinking.
Excavation
Excavation involves removing the topsoil to reach a stable sub-base. The depth of excavation depends on the soil type and the intended use of the driveway. Typically, a depth of 150-200mm is adequate.
Installing the Sub-Base
A stable sub-base is essential for a durable driveway. Crushed stone or gravel is spread and compacted to create a solid foundation. This layer helps with drainage and prevents the concrete from settling unevenly.
Formwork and Reinforcement
Setting Up the Formwork
Formwork refers to the wooden or metal frames that shape the driveway’s edges. These forms are secured in place to ensure the concrete maintains the desired shape and size during the pour.
Adding Reinforcement
Steel reinforcement bars (rebar) or wire mesh is added to the formwork. This reinforcement provides additional strength to the concrete, helping it withstand the weight of vehicles and resist cracking.
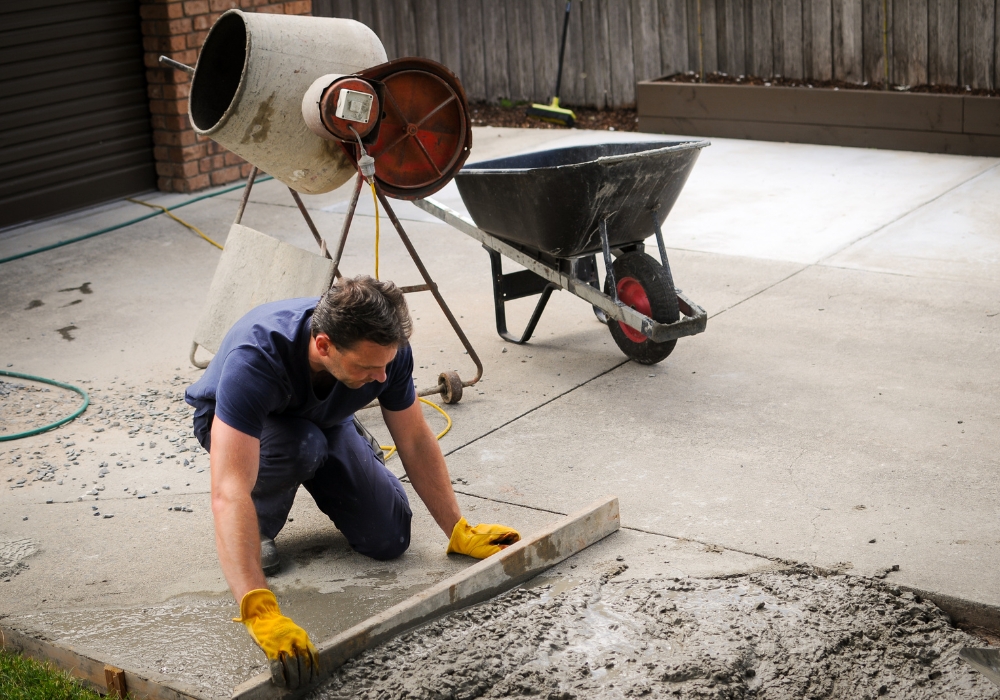
Pouring and Finishing the Concrete
Mixing and Pouring the Concrete
Concrete is mixed according to the specifications required for your driveway. The mixture is then poured into the formwork, starting at one end and working towards the other. It’s important to work quickly and efficiently to ensure a consistent pour.
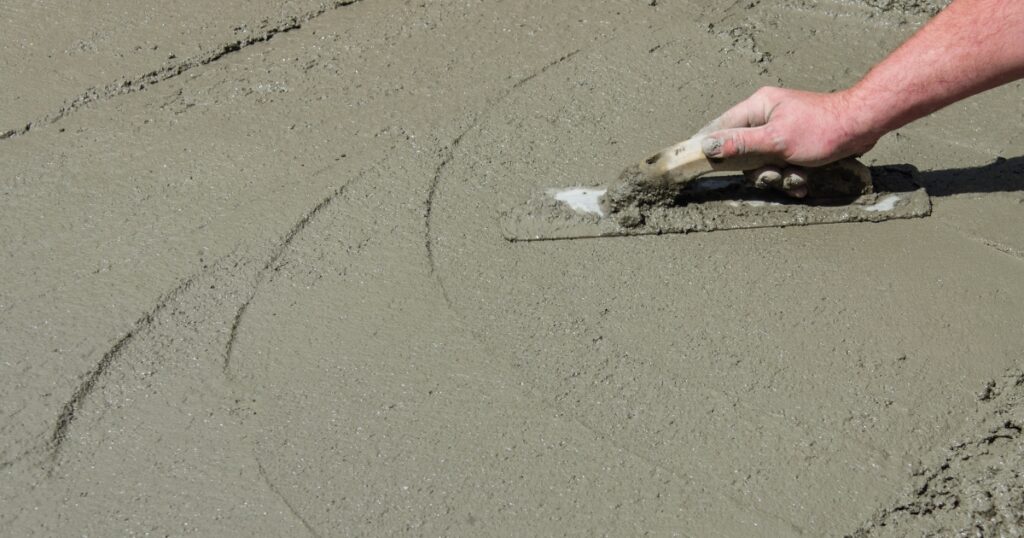
Levelling and Smoothing
Once the concrete is poured, it needs to be levelled and smoothed. A screed board is used to level the surface, followed by a bull float to smooth it out. Control joints are also added to allow for expansion and contraction, preventing random cracking.
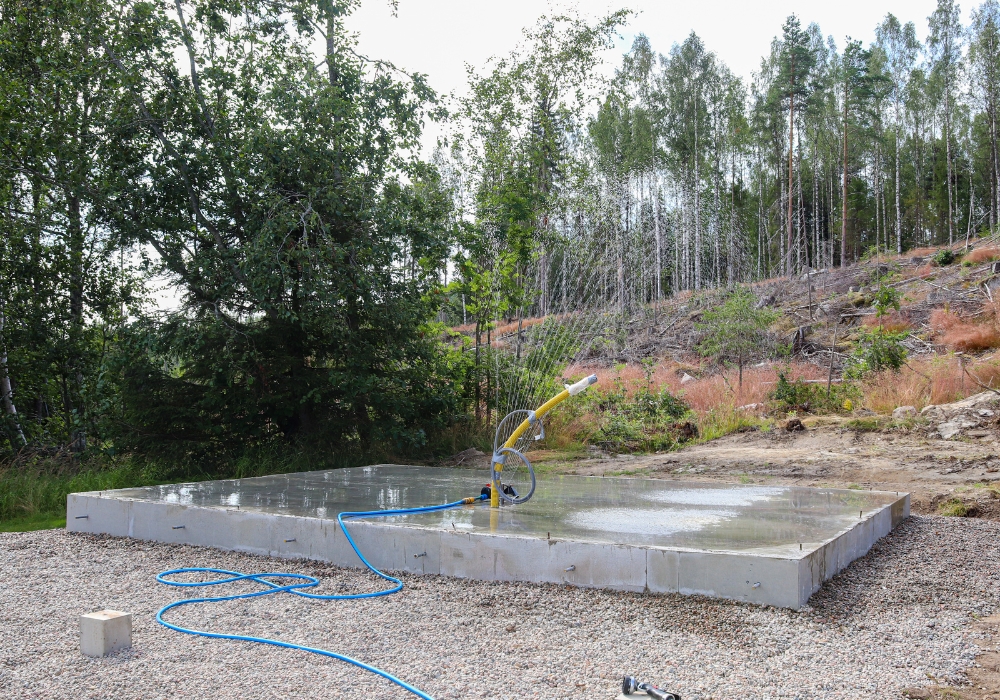
Curing and Sealing
Curing the Concrete
Curing is a critical step that allows the concrete to achieve its full strength. This process typically takes about 7 days, during which the concrete needs to be kept moist to prevent it from drying too quickly and cracking.
Sealing the Driveway
After the concrete has fully cured, applying a sealant helps protect it from stains, weather damage, and wear. Sealing extends the life of your driveway and keeps it looking new for longer.
Your Path to a Perfect Driveway
Installing a concrete driveway is a significant investment that adds value and functionality to your property. By following this comprehensive guide and enlisting the help of professional contractors, you can ensure a durable and aesthetically pleasing driveway that will serve you well for years to come. Remember, the key to a successful driveway installation lies in careful planning, quality materials, and expert workmanship.